

© Frank
Schneemann
Setting the Options
- Start a new Word document
- Click TOOLS
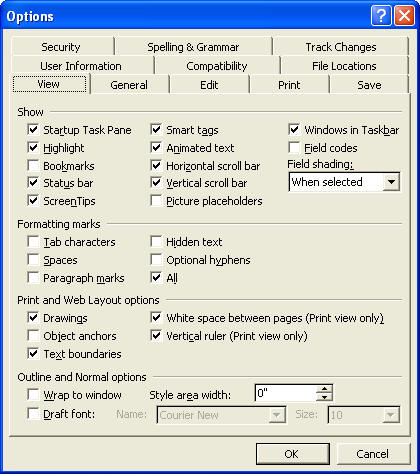
- Select OPTIONS from the menu
The options menu should open - Click the VIEW TAB
- Make sure ALL is selected under Formatting
Marks
You have to be able to see paragraph marks
Don't worry, these marks will not print - Make sure TEXT BOUNDARIES is selected under Print and Web Layout options
- Click OK
Page Layout
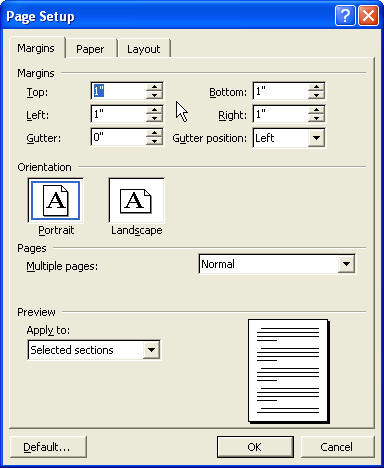
- Click the FILE MENU
- Select PAGE SETUP
- Set the margins to 1" all around
- If you want your margins to be 1" all the time, click the DEFAULT button
- Click OK
Creating a heading
- Hold down the CTRL key and Press E
This will place your cursor in the middle of the page - Type My News letter, or any other title you want to give to your page
- Highlight the text and select the Font and
Font Size you desire.
Font size should be around 48 points or more - Hit the ENTER KEY several times to leave blank spaces under your title

Creating a table below the heading for sub-title information
- Place the cursor on the first paragraph mark below your heading
- Open the TABLE MENU
- Insert a Table with 2 columns and 1 row
- You could also select the Table Icon and select 2 columns and 1 row
- Place the cursor in the left column
- Hold down the CTRL KEY and press L
To place the cursor on the left side of the box - Enter BV Journal Vol 2
or other text of your choosing
- Place the cursor in the right column
- Hold down the CTRL KEY and press R
To place the cursor on the right side of the box - Enter the Date
- Place the cursor in the table you just
created
We want to change some of the borders in the table you just created - Open the TABLE MENU and select TABLE
This will highlight (select) the entire table

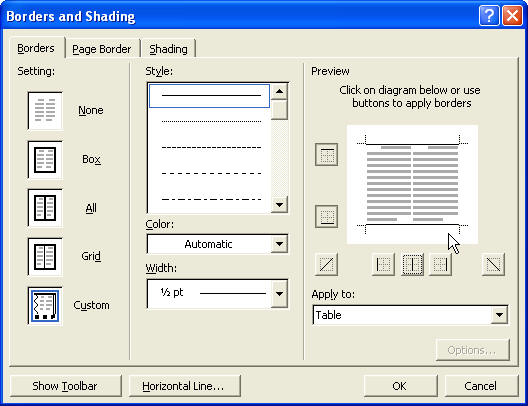
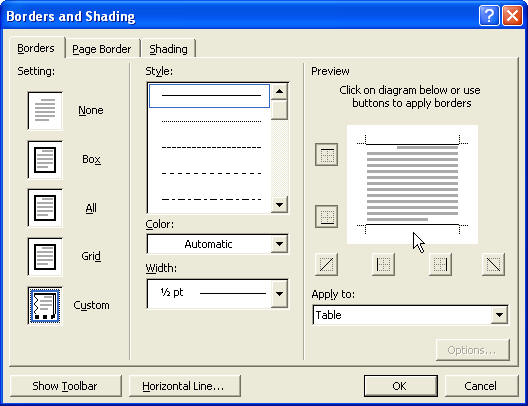
Removing the right and left lines from the border
-
Click the FORMAT MENU
-
Click BORDERS AND SHADING
-
Un-select the right, left and center border
-
You should only have Top and Bottom borders
-
You may change the width of the line if you like
-
Click PRINT PREVIEW
Your heading should look something like the one below

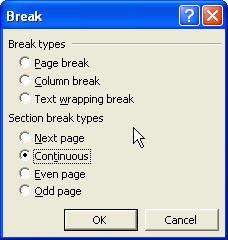
Inserting a Break
- Place your cursor on the second line below your heading
- Open the INSERT MENU
- Click BREAK
- Select CONTINUOUS
You should now have a Section Break that looks like the one below.
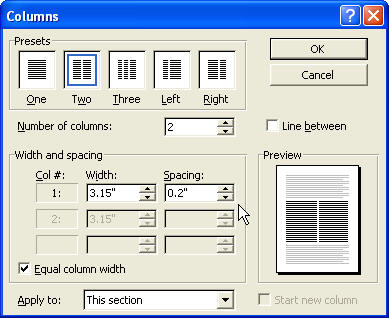
Changing the column layout in the second section
- Place your cursor on the second line below your Section Break
- Click the FORMAT MENU
- Click COLUMNS
- Select Two Columns
- Set the space between columns to .2
- Make sure it only APPLIES TO This Section
See Columns Menu on the right.
You now have a document with the heading formatted for 1 column and the body of the document below the heading formatted for 2 columns.Now you need to enter copy (Text) into your document. You can cut and paste from another document or type the text directly into the newsletter.
Now for some special formatting.Justify Text
- Our newsletter is going to be about Eskimo's so we have entered text on that subject.
- Highlight (Select) all of the text.
We want to JUSTIFY all of the paragraphs at once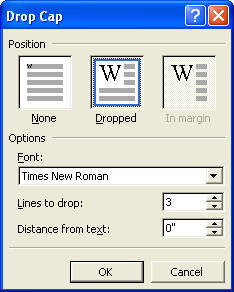
- After they are selected, click the JUSTIFY
ICON
All of the paragraphs are now "boxed" (justified
Drop Cap
- Place the cursor in the first paragraph
- Open the FORMAT MENU
- Click DROP
- Choose the type of drop you would like from the menu
White Space
- Leave a blank line between each paragraph
- Leave a blank line between each heading and the story below
Inserting Graphics
- Place the cursor anywhere in your document
- Find a graphic (picture) that you want to insert in your newsletter
- Open the INSERT MENU
- Click PICTURE then FROM FILE
See Graphic on right - Find the folder on your computer that contains the graphic
- Select the graphic and click OK
Formatting the GraphicRe-sizing
- Make sure the graphic is showing in your newsletter,
- Click the graphic
- You can re-size it by clicking on one of the buttons on the edge of the graphic and moving them
Positioning the graphic
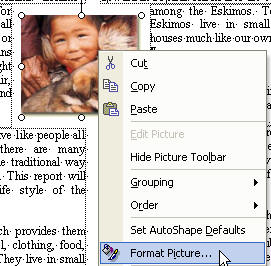
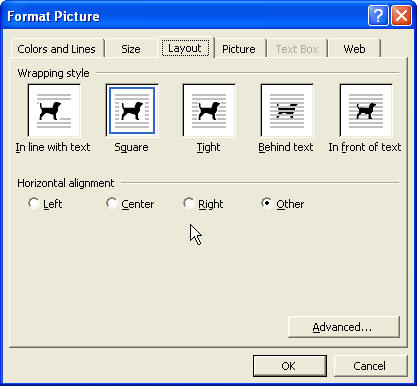
- Use the RIGHT mouse button and click the graphic
- Select FORMAT PICTURE
- Click the SQUARE icon
Now you can use the mouse to slide the picture and place it anywhere on the page

Inserting a footer
- Click the VIEW MENU
- Click VIEW HEADER AND FOOTER
- Click the FOOTER BUTTON

- Click the TABLE MENU
- Insert a table with 1 column and 1 row in the footer
- Click the icon to insert a page number in the footer

- Make sure your cursor is in the table inside your footer
- Click the FORMAT MENU
- Select BORDERS AND SHADING
- Remove the lines from the right and left side of the table border
Your finished newsletter should look like the one below.

Copyright © 2003 Frank Schneemann